-

Palico App
Your exclusive coffee journals.
Create your own brewing recipes with Palico app.
User Guide
-

Step One
Before first-time use, fully charge Grindtech for 4 hours.
-
The Grindtech will turn blue after fully charged.
Note: Please put Grindtech upside down on the charging base to charge. If it flashes pink, it means low battery. If you have already charged it for a long time and still flashes pink, please try to reposition it.
-

Step Two
How to Unlock Upper Housing from the Bean Hopper.
-
Open the bean hopper by turning the upper housing to the position.
Grip and hold the upper housing with one hand, use another hand hold the bean hopper, rotate the bean hopper into clockwise direction once you hear click sound, you can take out the upper housing.
-

Step Three
Prepare the Coffee Bean
-
Weigh the coffee beans based on your desired brew volume. Pour the beans into the bean hopper and close by replacing back the casing. Turn the housing to the right position.
Note:
Coffee bean hopper capacity: max.20g
-

Step Four
Grind Size Selection
-
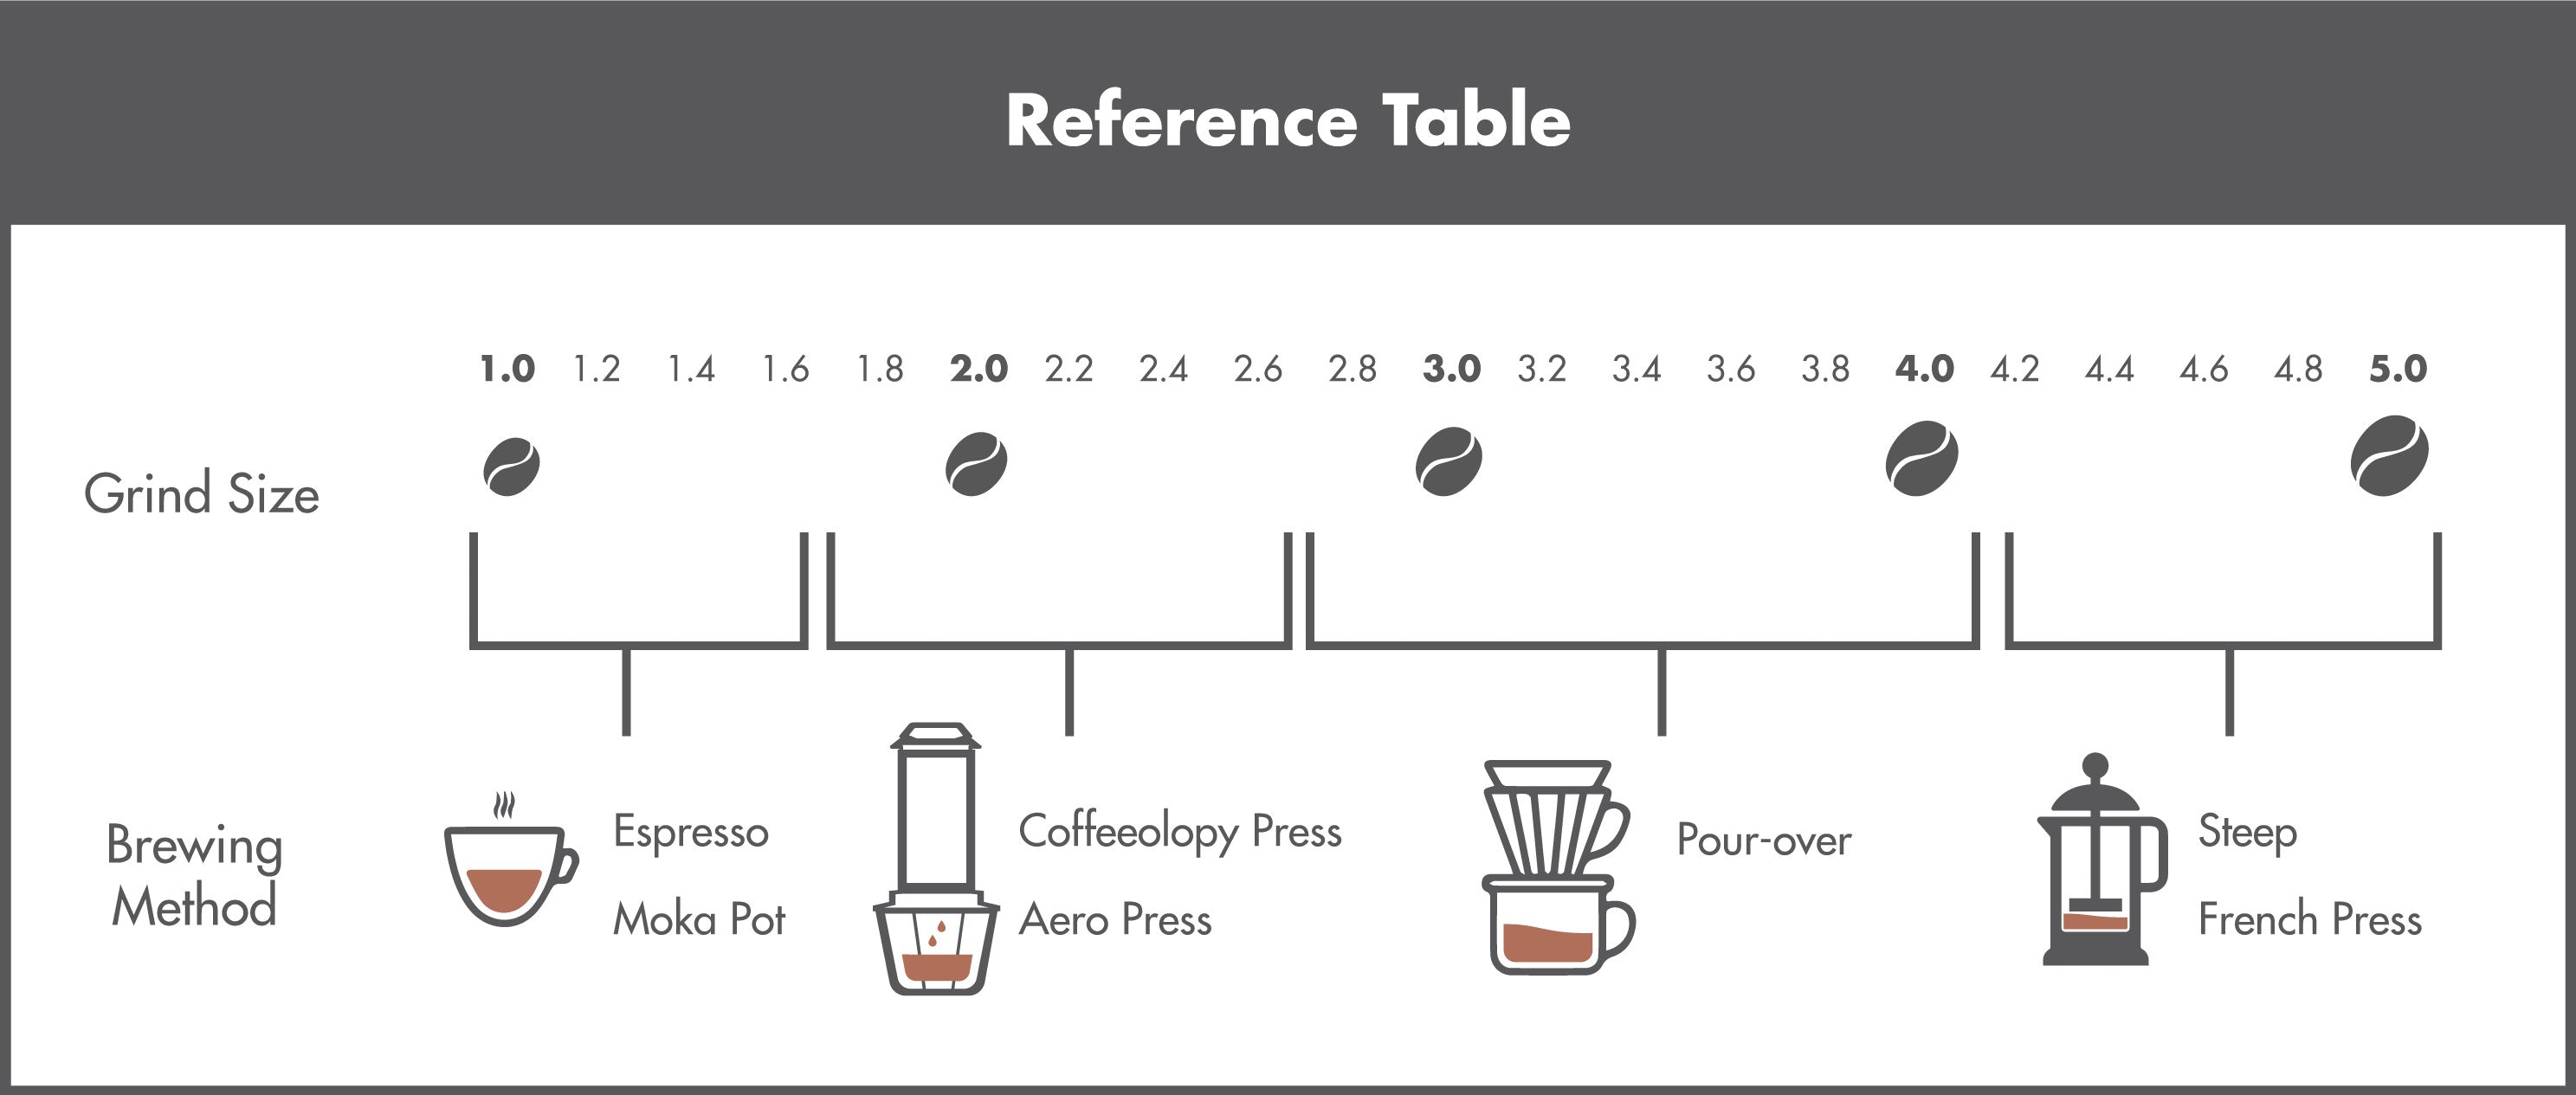
Select the desired grinding size by turning the grinding setting, from fine to coarse.
-

Step Five
Start Grinding
-
a. Press the P logo once to turn Grindtech on. The top will show breathing green light while it is in ready mode.
b. Press and hold the P logo for 2 seconds to start the grinding process. A breathing blue light will appear on top of Grindtech.
c. Once the desired quantity of beans has been ground, switch off the handy grinder by pressing P logo twice.
-

Step Six
-
a. Press the P logo once to turn Grindtech on. The top will show breathing green light while it is in ready mode. Open PALICO app to connect with your Grindtech.
b. Press Grind to start the grinding job.
c. Press Stop to stop the grinding job.
Note:
You can stop the grinding process at any time by pressing the P logo.
-

Step Seven
Dispense Ground Coffee into any Brewing Tool.
-
Simply take the coffee ground cup out and dispense ground coffee directly into any brewing tool.
ENJOY!


